His Name Endures Forever: An Object Lesson

I’d like to share a worship response object lesson we organized at summer camp last month. It was a little risky because we had about 300 campers and it could have gotten chaotic, but the kids did great and the end result was very moving.

First of all, when I say, “worship response,” I’m referring to something we do after the sermon/teaching time in a worship service. The band played soft worship music while the kids rotated around the room at various stations that helped them respond to God’s Word in a variety of ways. I go into more depth about this general idea in another post.

One of the stations this particular evening of camp invited the kids to write things down at two different tables. The theme of the camp was “I Am” and we looked at some of the “I Am” statements made by God in Scripture.

Table number one had poster boards, permanent markers, and a basket of cards wherein each card listed a name of God found in Scripture (“Counselor”, “Redeemer”, “Alpha and Omega”, “Good Shepherd”, etc.). The kids would come to this table, grab a card, and write what they saw on the card onto the poster (using a permanent marker).

20160712-IMG_0149

On table number two, we had a large white dry erase board and some dry erase markers. The children were invited (if they chose to do so) to come forward and anonymously write a sin or struggle on the white board using the dry eraser (see where we’re going with this?).

20160712-IMG_0147

When all the campers had written what they wanted at the two tables, we brought the posters and white board on stage. I instructed the band to play What Can Wash Away My Sins? Nothing But the Blood of Jesus while a child wiped away the sins and struggles from the dry erase board. It was a beautiful moment.

white-board-593370_1920

Then, as you can probably guess, we brought up the posters with the names of God all over them. I told the same child to try erasing it with the dry eraser. You should have seen the look on his face! He thought I was crazy for telling him to do so. But I wanted to make the point clear: as he attempted to erase the poster with God’s names, nothing was coming off. It was all permanent! And that is exactly the point of this illustration: Jesus wipes away our sins, but His name endures forever!

Your name, LORD, endures forever, your renown, LORD, through all generations. -Psalm 135:13

Want more creative ideas for Children’s Ministry? Sign up for my free monthly newsletter here.

Photo Credits to Christopher Seay of Next Level Kids Camp in Texas (all except the last photo).

A Brain Game for Ministry

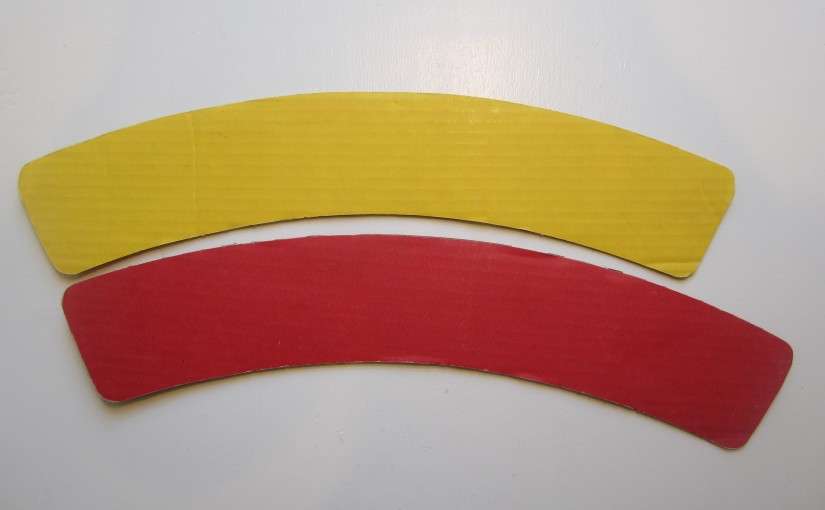
I like finding neat science tricks and visual illustrations that can be used to help communicate Biblical concepts in teaching. I found this neat brain game trick which I like to call the “curved arcs” from Steve Spangler Science. He sells the pieces I bought below. But you can also make your own and he has instructions on his site. I made my own large versions out of wood. The pictures below are the smaller cardboard type.

IMG_6979

At first glance, one may look smaller than the other.

IMG_6980

You can especially notice how they appear different lengths when you position them like this.

IMG_6981

This is the two pieces switched. Now the yellow one is “longer”!

But when you stack them (seen below), you realize they are the same size!

IMG_6983

Most adults pick up on this pretty quickly. Kids take a little longer to agree with you, of course. But no matter your age, it is still a fascinating reality. Two objects of the exact same size can appear to be different lengths depending on how they are positioned relative to one another.

Clearly our eyes and brains can play tricks on themselves. And that is one of the points I like to make in teaching kids about the Bible. There are several connections you can make here.

One that I make is that we as humans are all equally fallen sinners before God. We might compare ourselves to other people and think, “Well, I’m not as bad as that person!” The truth is, all have sinned and have fallen short of the glory of God (Romans 3:23). When you put the two arcs on top of one another, you realize that they are the same. We are the same as humans as well in terms of our guilt before a perfect and holy God.

What metaphors or illustrations would you make with this brain game? Have you used any in the past? Let me know if you have any ideas!

How to Build a Portable Puppet Theater

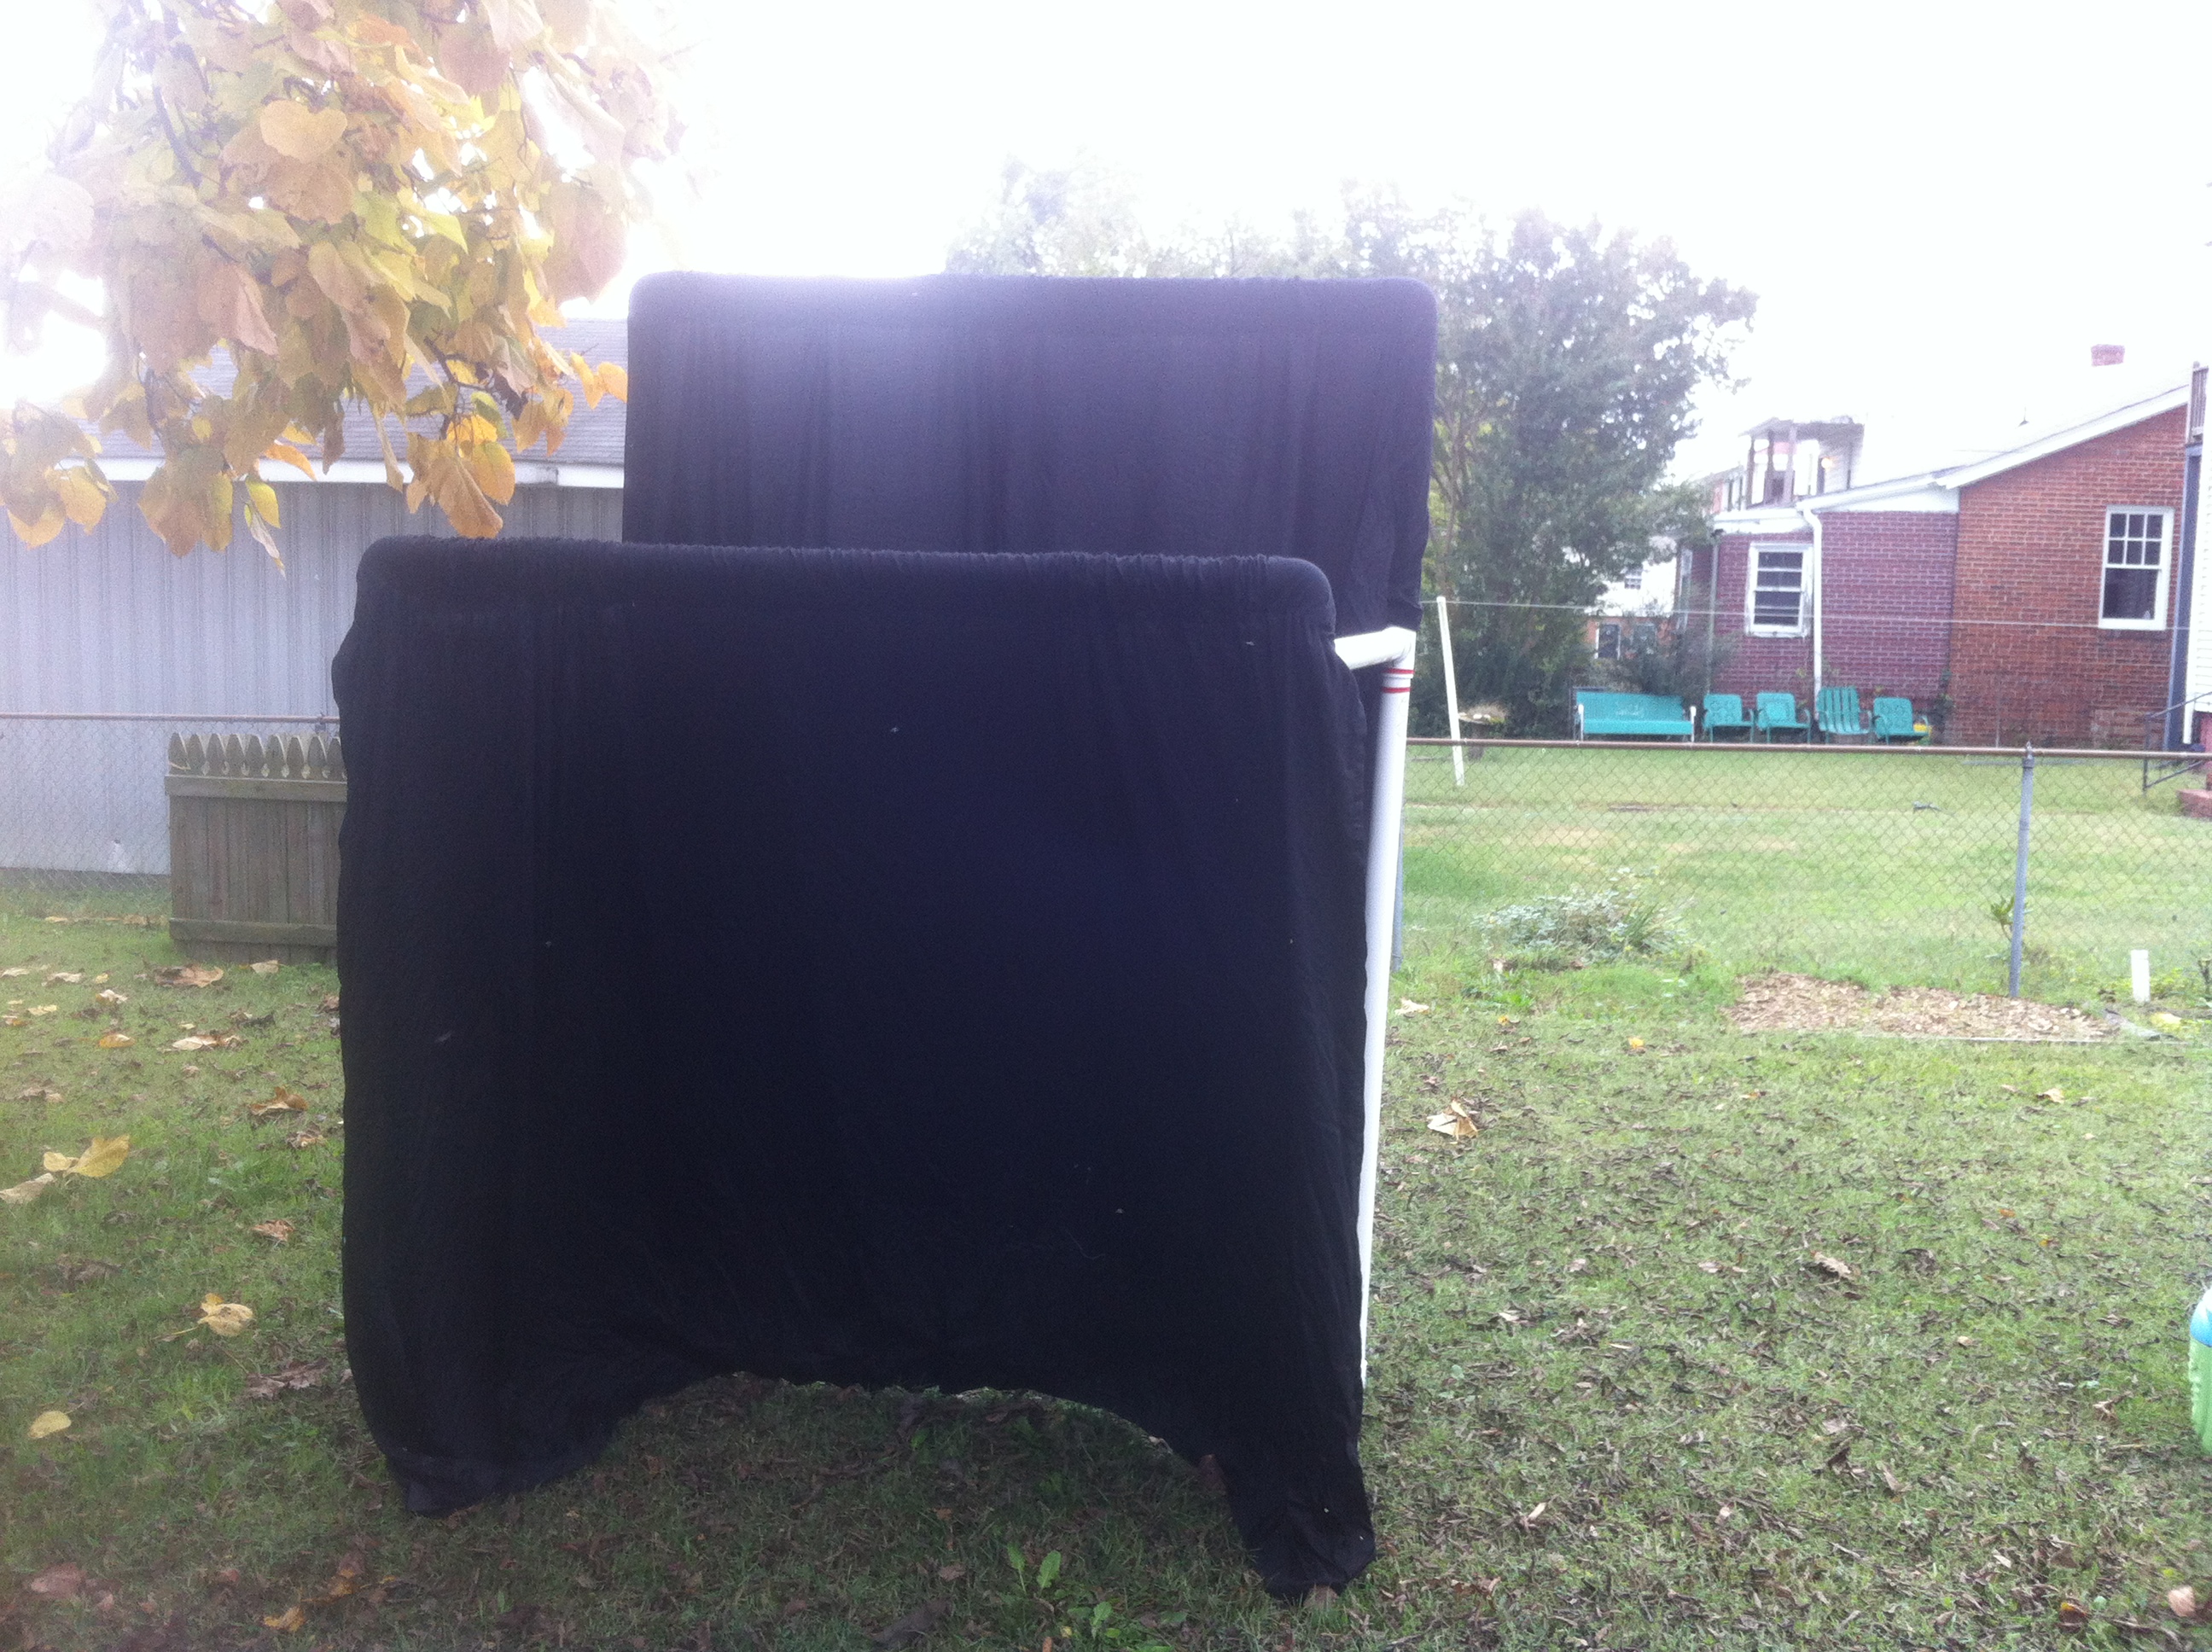
Several years ago I built a portable puppet theater out of PVC and black fabric. We have used it since then for puppet shows at our church. Our church has different locations, so this is perfect for moving the theater back and forth to different spots where we have children’s worship services and summer activities. In a few months, a friend of mine will be borrowing it for a class she is teaching on puppetry at her elementary school.

It has been such a convenient and affordable way to get a big payoff in terms of doing puppets for and with kids that I thought it would be worth sharing with you how it was built. I hope this comes in handy to someone out there who wants to build their own.

Want more ideas on crafts and supplies you can use in performance settings? Sign up here for my free monthly newsletter. It is full of ideas about children’s ministry and performing, along with updates about my road travels.

Materials: The materials cost me around $150. And it helped that I have a mother who sews, so she volunteered the labor of making the black fabric pieces that hang on the PVC piping. Here is a list of what you will need:

  • Four king-sized flat bed sheets (black color)
  • Four 10-foot lengths of 2″ PVC piping (if you can only get 8-foot lengths, you’ll need to get seven pieces)
  • Four T-couplings of 2″ PVC
  • Four 90-degree elbow couplings of 2″ PVC
  • Four flat caps of 2″ PVC
  • Seven different colors of electrical tape (only about a foot of length needed for each color)
  • A saw fit for cutting PVC
  • Someone with basic sewing skills and a sewing machine (if you don’t have this, then you’ll need to find a way to attach the fabric to the stage on your own, which is very possible with some creativity)

Steps:

Step 1: Cut three of the 10-foot PVC lengths in half, leaving you with six 5-foot lengths.

Step 2: Cut the remaining 10-foot PVC length into the following: two 30-inch lengths, two 24-inch lengths, and two 2.5-inch lengths, and you should have some scrap remaining.

Step 3: Assemble the pieces into the design as seen in the pictures below. It is fairly simple, so study these pictures a bit and you’ll see how all the parts fit together. The caps are the feet of the four posts. The 5-foot lengths are the four posts and the two that go across from side to side. The 30-inch pieces are the front-back connectors. The 24-inch pieces are the height extensions on the back posts. The 2.5-inch pieces serve as a way to connect the T-couplings to the 90 elbow couplings on the front part of the stage. All of this makes the stage just over seven feet tall in the back and just under six feet tall in the front. It is about three feet deep.

Step 4: Take the four king sized black flat bed sheets and sew 2 sheets together and then the remaining 2 sheets together, so you are left with two pieces that are roughly 12-foot by 6-foot each. Then fold and sew a 5.5-inch” “tunnel” across the 12-foot length of the sheets. This tunnel will be large enough to slip over the 2-inch PVC.

Step 5: Color code all of your connections using the colored electrical tape. This helps for re-assembly when people unfamiliar with the stage are helping to set it up.

Step 6: Slip the sheets on using the tunnels as seen the pictures. Stand up the stage if you haven’t already. Get out your puppets and have fun!

IMG_2222
This is the stage laying on its back. The longer lengths on the sides will be a front extension, as you’ll see in the next pictures.
IMG_2225
Those two pieces sticking up are the 30-inch lengths. They go into the T-couplings.
IMG_2226
Use three of the 5-foot lengths to finish this off. Two are the front posts (hanging in the air) and one is the “across” piece at the top of this picture. The stage is still laying on its back at this point. You are now ready to stand it upright.

IMG_2227

IMG_2229

IMG_2230

IMG_2259
This is that short 2.5-inch piece that connects your T-coupling to the 90 elbow coupling on the front side of the stage.
IMG_2257
Sew together 2 king-sized flat black bed sheets into a 12-foot by 6-foot large piece. Do this twice.
IMG_2258
This is the “tunnel” that you need to sew. Just fold over about 5.5-inches of fabric across the 12-foot length of the black sheets. Sew that part down.

IMG_2231

IMG_2232

IMG_2235

IMG_2233

IMG_2253

IMG_2256

Want more ideas on crafts and supplies you can use in performance settings? Sign up here for my free monthly newsletter. It is full of ideas about children’s ministry and performing, along with updates about my road travels.

Need a speaker/entertainer for your next event? Get a free quote on my juggling show here. I travel full-time nationwide.

Page_1 (2)